Tapio Specifications
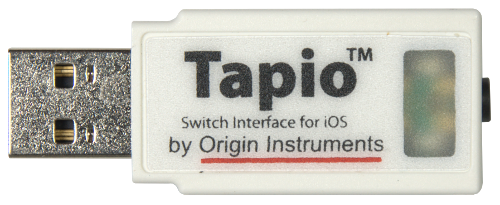
TapioTM Specifications
iPad, iPhone and iPod touch Switch Interface
 (Tapio comes with an Apple Lightning or a USB-C adapter.)
- Lightning Fast and Low latency
- Very Low Power
- Host powered — No Batteries to Charge or Replace
- Reliable Direct Connection — No Bluetooth Pairing Issues, Drop-outs, or Sluggish Connections
- Use re-charge Lightning adapter to charge iPad/iPhone while using Tapio
- Use on iPad Pro with a USB-C adapter
- Multi-Platform:
- Apple iOS Devices
- Android Tablets and Phones
- Mac, Windows, Chromebook and Linux computers
- Speech Generating Devices
- 3.5-mm (1/8-inch ) stereo jack
- Accepts a Single Switch Directly
- Accepts Two Single Switches with an available Stereo-to-Mono Adapter
- Accepts Dual Switches Directly with a stereo plug
- Apple Switch Control (iOS 7 and newer) Events
- Switch Access for Android (version 5.0 and newer) Events
- RJ Cooper Switch Events
- Keyboard Switch Events
- Mouse Button Events
- Joystick Button Events
- Supports USB Remote Wakeup
- Full Speed USB device
- Uses standard, USB Human Interface Device (HID) drivers
- Weighs ½-ounce (14-grams)
- 2- by 0.8- by 0.5-inches (51- by 20- by 13-mm)
- 1-year limited warranty
- Origin Instruments Quality, Reliability and Support
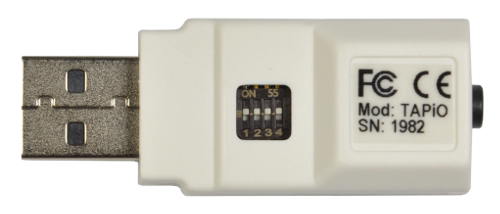
 (Tapio mode selection DIP switch. Shown with all switches ON or UP.)
Tapio's integrated DIP Switch selects iOS Device specific modes, mouse, joystick, or keyboard functions as shown in the table below.
| DIP Switch | Mode | Outputs† | Timing | |||
|---|---|---|---|---|---|---|
| 1 | 2 | 3 | Switch 1 | Switch 2 | ||
| ON | ON | ON | Tapio-1 (Default) | Space | Enter | Full Duration |
| OFF | ON | ON | Tapio-2 | Space | Enter | Pulse |
| ON | OFF | ON | RJ | ~ 1 | ~ 3 | Pulse |
| OFF | OFF | ON | Rich | Space 1 | Enter 2 | Pulse-Pulse |
| ON | ON | OFF | Mouse | Left | Right | Full Duration |
| OFF | ON | OFF | Joystick | #1 | #2 | Full Duration |
| ON | OFF | OFF | Keyboard-1 | Enter | Space | Full Duration |
| OFF | OFF | OFF | Keyboard-2 | 1 | 2 | Full Duration |
(SW4 is reserved and should be ON.)
† Use a scripting language such as AutoHotKey on Windows to translate these events into others, some examples are found on the manufacturer's Software Demos page.
Outputs describes the keyboard keys, mouse buttons, or joystick buttons that are sent when the first and second adaptive switches are actuated. In most cases one key is sent in two cases (RJ and Rich Modes) two keys are sent in quick succession.
Timing further describes how keys are sent.
For Full Duration timing, Tapio holds the keyboard key, mouse button or joystick button down as long as the associated adaptive switch is held down.
For Pulse timing the key is held down only briefly and released no matter how long the associated adaptive switch is held down. For example, in RJ mode when an adaptive switch is first pressed the ~ (tilde) and then the 1 (ONE) keys are sent in quick succession. Nothing happens when the adaptive switch is released.
For Pulse-Pulse timing, when the adaptive switch is pressed Tapio briefly holds down and releases the first key listed, and when the adaptive switch is released Tapio briefly holds down and releases the second key listed. For example, in Tapio's RICH mode when the adaptive switch is pressed and held Tapio "presses" and immediately releases the SPACE key. Then, when the adaptive switch is released Tapio "presses" and immediately releases the 1 (ONE) key. This allows applications to know exactly when an adaptive switch was pressed and when it was released. Knowing the leading and trailing edges of switch actuation allows app developers to employ more efficient scanning techniques.
How do I generate more than a few keyboard characters, mouse clicks, or joystick buttons?
You could write a traditional program. Or you could employ an easier to use scripting language, such as AutoHotKey on Windows.
We have a few example scripts on the manufacturer's Software Demos page. You really are limited by your imagination.
One script remaps adaptive switch events generated by Swifty, Tapio or Breeze into other keyboard characters. Another copies and pastes text to the Windows Clipboard. For HeadMouse users with two large monitors, there is a script that centers the mouse pointer on either monitor.
Finally, if you are just trying to trigger some process unrelated to assistive technology, Swifty is an excellent way to input that event to a computer's USB port. You can start small with a scripting language and move to a more complicated program if needed.


